Are you an RV enthusiast who loves hitting the open road in your trusty 2009 Jayco Jayflight 25 BHS? If so, you know that maintaining your vehicle is crucial for ensuring safety and smooth journeys. One important aspect of your RV’s maintenance is taking care of its electric brakes. These brakes play a vital role in providing control and stability while driving. But when they need replacement, where do you start? In this article, we will explore the process of electric brakes replacement in your 2009 Jayco Jayflight 25 BHS, with tips and tricks to make it easier for you.
What exactly is involved in replacing the 2009 Jayco Jayflight 25 BHS electric brakes? We’ll walk you through the entire process, from understanding the key components to the step-by-step procedure. You’ll also learn about the signs that indicate it’s time for a replacement and what tools you’ll need to get the job done. With our guidance, you’ll feel confident tackling this project on your own, even if you’re new to the DIY scene.
Replacing electric brakes can be a daunting task, but it doesn’t have to be. By the end of this article, you’ll not only understand the process but also appreciate the benefits of keeping your RV in top condition. Get ready to roll up your sleeves and give your beloved 2009 Jayco Jayflight 25 BHS the attention it deserves. Let’s get started!
Why Electric Brakes Matter
Electric brakes are essential for your RV because they help control your vehicle’s stopping power. They ensure smooth and safe braking, which reduces the risk of accidents. Imagine driving down a steep hill with a heavy load—electric brakes make it easier to control the vehicle.
For RV enthusiasts, understanding the importance of electric brakes is crucial. These brakes distribute the weight of your RV evenly, preventing wear and tear on your tow vehicle’s brakes. This balance saves you money on repairs over time.
Additionally, electric brakes provide peace of mind. Knowing that your RV’s braking system is reliable allows you to focus on enjoying your adventure. Remember, safety always comes first!
Signs Your Brakes Need Replacement
How do you know when it’s time to replace your electric brakes? One of the most common signs is a squeaking or grinding noise when you press the brake pedal. This sound indicates that the brake pads are worn out and need attention.
Another sign to watch for is decreased braking performance. If your RV takes longer to stop or feels less responsive, it’s time to inspect the brakes. Reduced performance can be a safety hazard, especially when towing heavy loads.
Lastly, check the brake pads regularly. If they appear thin or have less than 1/4 inch of material left, it’s time for a replacement. Keeping an eye on these signs will help you maintain your RV and ensure safe travels.
Tools You’ll Need
Before you begin the replacement process, gather the necessary tools. Having the right equipment simplifies the task and ensures safety. You’ll need basic tools such as a wrench set, screwdrivers, and pliers.
Additionally, you’ll need a jack and jack stands to lift your RV safely. These tools provide stability while you work on the brakes. Safety goggles and gloves are also essential to protect yourself during the process.
Don’t forget the new brake pads and any other replacement parts needed for your specific model. Check your RV’s manual to ensure compatibility. With the right tools and parts, you’re ready to tackle the brake replacement!
Understanding Brake Components
To replace electric brakes, it’s essential to understand their components. The main parts include the brake drum, magnet, and shoes. Each component plays a role in ensuring proper function.
The brake drum is a metal cylinder that rotates with the wheel. It creates friction when the brake shoes press against it, slowing the vehicle. The magnet is an electromagnet that activates the brake shoes.
Finally, the brake shoes are curved pieces with friction material attached. They press against the drum to create friction and slow the vehicle. Understanding these components will help you during the replacement process.
Preparing for Replacement
Preparation is key when replacing electric brakes. Start by parking your RV on level ground and securing it with wheel chocks. Turn off the power and disconnect the battery to prevent accidents.
Next, raise your RV using a jack and place it securely on jack stands. This step provides stability while you work on the brakes. Ensure that the RV is stable before proceeding to avoid accidents.
Gather all necessary tools and replacement parts before starting. Having everything ready streamlines the process and prevents unnecessary delays. With the right preparation, you’re ready to replace the brakes!
Removing the Old Brakes
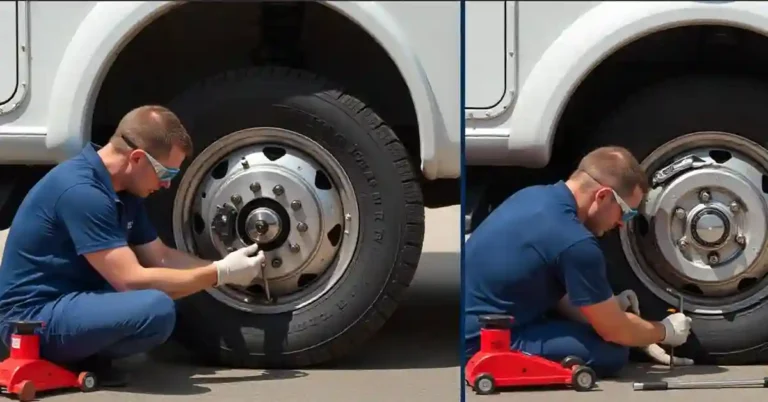
Begin by removing the wheel and tire to access the brakes. Use a wrench to loosen the lug nuts and slide the wheel off. This step exposes the brake drum and other components.
Next, remove the brake drum by pulling it off the axle. You may need to tap it gently with a mallet if it’s stuck. Be careful not to damage the drum or surrounding parts.
Once the drum is removed, you’ll see the brake shoes and magnet. Carefully detach these components, noting their positions for reassembly. Removing the old brakes sets the stage for installing the new ones.
Installing New Brake Components
With the old brakes removed, it’s time to install the new components. Start by attaching the new brake shoes to the backing plate. Ensure they are positioned correctly for optimal performance.
Next, install the new magnet in its designated spot. The magnet creates the necessary force to activate the brake shoes. Check that all connections are secure before proceeding.
Finally, replace the brake drum over the new components. Ensure it fits snugly and rotates smoothly. With everything in place, you’re ready to adjust the brakes for optimal performance.
Adjusting the Brakes
Properly adjusted brakes are crucial for safety and performance. Begin by manually adjusting the brake shoes. Turn the adjuster wheel until the shoes are slightly touching the drum.
Test the brake rotation by spinning the drum. It should rotate freely with minimal resistance. If it doesn’t, adjust the shoes until you achieve the correct balance.
Once the brakes are adjusted, reinstall the wheel and tire. Tighten the lug nuts securely to ensure stability. With the brakes adjusted, your RV is ready for the road!
Testing the New Brakes
After installation, it’s crucial to test the new brakes. Start by reconnecting the battery and turning on the power. Check for any warning lights or issues before proceeding.
Take your RV for a short test drive in a safe area. Gradually apply the brakes to assess their performance. Listen for unusual noises and ensure the stopping distance is adequate.
If everything checks out, your new brakes are ready for your next adventure. Regular testing and maintenance ensure safe and enjoyable travels in your 2009 Jayco Jayflight 25 BHS.
Safety Tips for Brake Replacement
Safety is paramount when working on electric brakes. Always wear safety goggles and gloves to protect yourself from debris and sharp edges. Ensure your RV is secure on jack stands before beginning any work.
Keep a fire extinguisher nearby in case of emergencies. Although unlikely, electrical components pose a fire risk. Being prepared ensures your safety and peace of mind.
Finally, follow the manufacturer’s guidelines for your specific RV model. These instructions provide valuable insights for safe and effective brake replacement. Prioritizing safety ensures a successful repair and enjoyable road trips.
Troubleshooting Common Issues
If you encounter issues during the replacement process, don’t worry. Common problems include difficulty removing the drum or securing new components. These challenges are manageable with the right approach.
For stubborn drums, use a rubber mallet to gently tap around the edges. This technique loosens the drum without damaging it. If securing components proves difficult, double-check their alignment and positioning.
If problems persist, consult your RV’s manual or seek professional assistance. Addressing issues promptly ensures a smooth and successful brake replacement. Don’t hesitate to reach out for help if needed.
Maintaining Your New Brakes
Once your new brakes are installed, regular maintenance is essential. Inspect the brake components periodically for signs of wear and tear. Catching issues early prevents costly repairs and ensures safety.
Keep an eye on the brake fluid levels and replenish as needed. Proper fluid levels are crucial for optimal braking performance. Regularly clean the brake components to prevent buildup and corrosion.
By maintaining your new brakes, you extend their lifespan and enhance your RV’s safety. Consistent care ensures reliable performance and enjoyable journeys in your 2009 Jayco Jayflight 25 BHS.
FAQs With Answers
What tools do I need for electric brake replacement?
To replace electric brakes, you’ll need a wrench set, screwdrivers, pliers, jack, and jack stands. Safety goggles and gloves are also essential for protection. Gather these tools before starting the replacement process.
How do I know when to replace my electric brakes?
Replace your electric brakes when you notice squeaking or grinding noises, decreased braking performance, or thin brake pads. Regular inspections help identify these signs early, ensuring safety on the road.
Can I replace my RV’s electric brakes myself?
Yes, you can replace your RV’s electric brakes with the right tools and guidance. Ensure you follow safety precautions and consult your RV’s manual for specific instructions. If unsure, seek professional assistance.
How often should I inspect my RV’s brakes?
Inspect your RV’s brakes every six months or before long trips. Regular inspections help identify wear and tear, ensuring timely replacements and safe travels.
What benefits do electric brakes offer for RVs?
Electric brakes provide improved control, reduced wear on tow vehicle brakes, and enhanced safety. They ensure smooth stopping, especially when towing heavy loads, contributing to a safer driving experience.
Conclusion
Replacing the electric brakes on your 2009 Jayco Jayflight 25 BHS is an essential task for ensuring safety and performance. With the right tools, knowledge, and preparation, you can confidently tackle this project on your own. Regular maintenance and inspections will keep your brakes in top condition, providing peace of mind during your travels. Remember, a well-maintained RV is a reliable companion on your adventures. Now that you’ve learned how to replace your electric brakes, you’re ready to hit the road with confidence and enjoy the freedom of the open highway!